Edging tape for worktops usually fails for three reasons: a dirty or damp surface, the wrong heat or pressure, and moisture creeping in at the edge. Fix those, re-bond the tape and seal the edge, and most failures stay fixed.
- Dust, grease and damp are the biggest reasons tape lifts.
- Use a medium-to-hot iron with the steam off.
- Let the bond settle before you trim.
- Seal exposed edges, especially around sinks.
- Light peeling is fixable. Swollen board usually isn’t.
Why The Tape Lets Go
Most people blame the tape. Usually, the tape is fine.
The glue on iron-on edging is heat-activated. It needs a clean, dry, stable surface and the right amount of warmth. Get either wrong and it never quite grips. It might look fine for a few weeks, then a corner lifts.
Here are the four mistakes behind most failures.
Mistake 1: Skipping The Prep
Dust, grease and old finishes are glue’s worst enemy.
Ironmongery Direct says the edge should be cleaned of dust, dirt and grease, and be fully dry before you start. Veneers Online goes further. It says the surface should be stripped of anything like paint or varnish, and be clean, sound and heat-resistant.
A quick wipe with a damp cloth isn’t enough. Let it dry properly first.
ALSO READ: What is the Average Cost to Decorate a Room: My Budget Reality Check
Mistake 2: Getting The Heat And Pressure Wrong
Too cool and the glue doesn’t melt. Too hot and you can mark the tape.
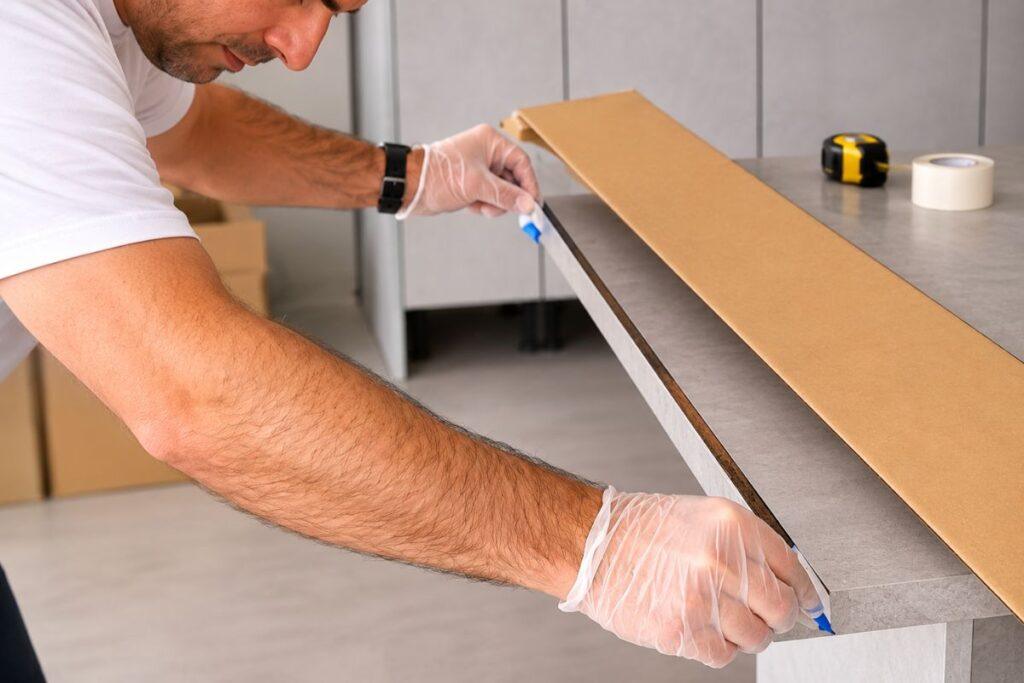
Veneers Online recommends a normal domestic iron on a medium-to-hot setting, with steam off. It also suggests putting a cloth between the iron and the tape. Work along the strip, back and forth, several times. Then press it down with a cloth-covered block.
Irons vary. Their own advice is that “medium” on one can run hotter than on another. Test on an offcut first.
And don’t lean on it like you’re flattening a pancake. The same page warns that too much pressure can damage the edging.
Mistake 3: Trimming Too Soon
This one catches out plenty of confident DIYers. Finishing touches like edging are easy to rush, much like the small hardware upgrades around the house that look simple but reward patience.
You trim the overhang, and a chunk of tape snaps off with it. That’s often a sign the bond wasn’t properly made. Veneers Online says to check the bond is good before trimming, or the edging can break off in the visible decorative area.
Ironmongery Direct agrees on patience. Trim only once the adhesive has set, then file or sand the edge smooth. Take your time. A slow pass beats a ragged one.
Mistake 4: Letting Moisture In
This is the sneaky one. It’s why edges fail near the sink, kettle or dishwasher. Steam and splashes hit the wall behind the worktop too, which is why many people pair a sealed edge with moisture-resistant surfaces such as hygienic wall sheets.
Worktop Express points out that the top front edge is the most vulnerable to water. It also advises sealing around an overmounted sink with mould-resistant silicone, so water doesn’t swell the fibreboard. If a dishwasher or washing machine sits under the worktop, it recommends a moisture barrier.
If you’re still planning your kitchen layout, try not to cluster the sink, dishwasher and washing machine along a single run of worktop, so no one stretch of edging takes all the splashes.
EGGER makes a similar point. Sealing joins and bare edges keeps moisture out, which otherwise can cause swelling over time. The same thinking applies to any wet room, and sealing joins and edges is a standard step in a proper bathroom renovation.
Warranty matters here too. EGGER says to use its own EGGERSeal on its worktops to avoid invalidating the 10-year guarantee. Worktop Express adds that ignoring installation instructions can void a product warranty. Check yours before reaching for the silicone.
Quick Reference
| Mistake | What you’ll see | Fix | Source |
|---|---|---|---|
| Dirty or damp edge | Tape lifts soon after fitting | Clean, dry, then re-bond | Ironmongery Direct |
| Wrong heat or pressure | Weak bond, marked tape | Medium-to-hot iron, no steam, cloth, light pressure | Veneers Online |
| Trimming too early | Chips or snapped tape | Check the bond first, then trim | Veneers Online |
| Moisture at the edge | Lifting, swelling near sink | Seal edges with suitable silicone or sealer | Worktop Express, EGGER |
How To Fix A Failing Edging Tape For Worktops
If the board underneath is still solid, you can usually rescue it.
- Lift the loose section. Gently peel it back. Don’t force the parts that are still stuck.
- Clean and dry. Remove dust and loose residue. Let everything dry fully.
- Re-bond. Re-heat the tape through a cloth. If the glue won’t reactivate, use contact adhesive, as Ironmongery Direct suggests for applying strips.
- Press and wait. Roll or press it down along the full length. Leave it to set.
- Trim and smooth. Remove the overhang, then file it flush.
- Seal. Protect any exposed edge, especially near water.
If the board feels soft, crumbly or visibly swollen, new tape won’t help. That section needs replacing. If the swelling has spread along a whole run, it may be worth weighing a wider refresh instead, and our guide to modern vs classic kitchen renovation can help you decide which direction to go.
FAQs
Q1: Can I Re-Stick Edging Tape That Has Peeled?
Yes, if the board is sound. Clean it, dry it, then re-heat the tape or use contact adhesive.
Q2: What Iron Setting Should I Use?
Medium to hot, with steam off. Irons differ, so test on an offcut first.
Q3: Why Does Edging Peel Near The Sink?
Water gets in at the edge and weakens the board and the bond. Sealing with mould-resistant silicone helps.
Q4: Should I Trim Straight Away?
No. Let the adhesive set first, or the tape can snap off.
Q5: Do I Need To Seal The Edge As Well?
Worktop Express and EGGER both advise sealing exposed and bare edges, particularly in wet areas.
Disclaimer: This article is published strictly for informational purposes regarding DIY worktop maintenance and repair, and it is not intended for product promotion or commercial endorsement. Readers should independently verify all facts, techniques, and product specifications before undertaking any home improvement projects, and seek professional advice when necessary.